How to make a DIY Photo Booth Frame
A great way to entertain your guests on your big day is to make your very own custom photobooth frame for them to use as a prop. It also helps everyone remember your hashtag if you’re choosing to use one.
Watch my quick video tutorial here:
...and check out my written instructions below:
The below content contains affiliate links and we may earn a commission if you shop through them, however this won't cost you anything, it just helps us to keep the site running for free. For more information on affiliate links, see our disclosure here.
WHAT YOU NEED:
Foam Board (I used an A2 size board but you can use a bigger one if you want)
Pencil & Ruler
Utility Knife or Scissors
Something to protect the surface under the board (I used a flattened cardboard box)
Vinyl Decal wording (plus transfer tape) or a marker pen
Fake flowers/Decorations/Paint (Optional)
STEP ONE:
Before cutting the board put something down like a cardboard box to protect the surface underneath.
Mark out where you want the hole in your frame to go with a pencil and a ruler. Use a polaroid picture for inspiration, and if you’re using a vinyl decal, place that on the board first to make sure you have left enough space.
STEP TWO:
Very carefully use your utility knife to cut around the pencil lines. If you don’t have a utility knife then you can also use scissors.
Once you have cut around the whole of the pencilled rectangle, carefully push the middle out. You may need to go around the lines a couple of times if they don’t work the first time around.
STEP THREE:
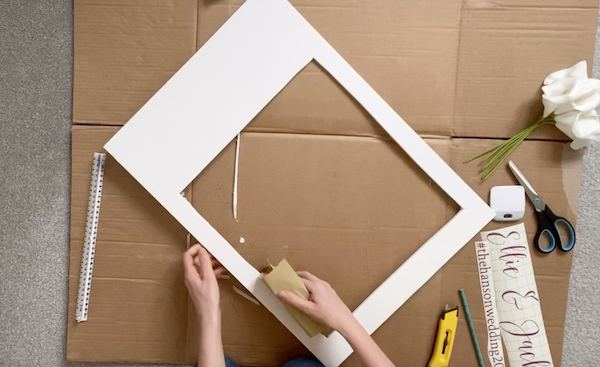
Use the knife or scissors to straighten out the edges if needed and then use some sandpaper to lightly sand the edges that have just been cut so that they are as smooth and straight as possible.
STEP FOUR:
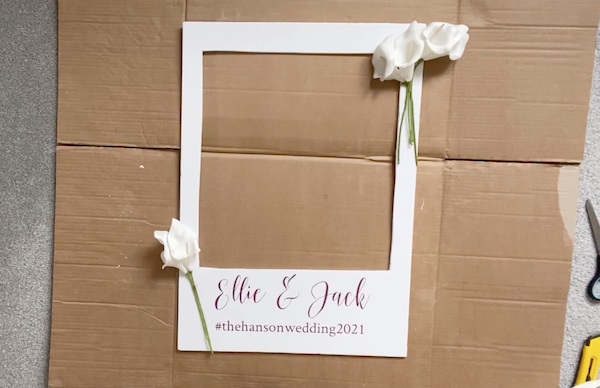
At this stage you may want to paint your foam board a different colour (spray paint or acrylic paint works best). Once that is dry, or if you’re keeping it white, it’s time to apply your vinyl decal or write your wording on the frame. You could put the wording at the top and bottom, just the bottom, or even up the sides, it’s up to you!
STEP FIVE:
You can either leave it as it is with just words, or you can add additional fake or paper flowers, fairy lights or other decorations.


