How to make your own Wedding Guest Book (no artistic skills required)
This is a super easy and cheap way to make your own personalised and unique wedding guest book, even if you're artistically challenged.
The below content contains affiliate links and we may earn a commission if you shop through them, however this won't cost you anything, it just helps us to keep the site running for free. For more information on affiliate links, see our disclosure here.
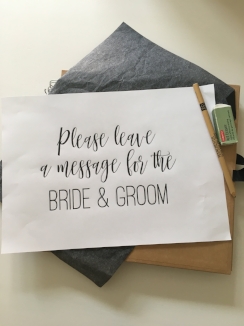
All you need for your rustic wedding guest book are the following materials...
+ a print out of your design, a pencil, a rubber and some washi tape, although that last bit is optional.
First step: Make your design
Take a look at Pinterest if you need some inspiration, and then make your design on a computer, making sure the size of the wording will fit on the front of your book. Standard printer paper covers most standard sized scrapbooks so it may be helpful to measure it out using a blank page first, and it will give you an idea of what size the design should be.
I use photoshop but you can use PicMonkey which is a cheaper design software (and has a free trial!), or you could just do it on Word if it is a really simple design like this one.
If you need some new fancy fonts to use for your design check out my blog post here and pick up some freebies.
Once the design is ready, print it out in black ink (any normal home printer will do)
Second Step: Transfer the design
Put the carbon paper, shiny side down, on top of your blank scrapbook cover, and then put the printed design on top of that, with the lettering facing up. Use your pencil to outline all of the letters.
Try to be as neat as possible and don’t press down too hard. Most of the carbon should rub off once the design is dry, but it’s good not to do it too heavy so that any you can't get rid of can just be gone over with pen.
When you finish, remove the carbon paper and print out and you will be left with an outline on the scrapbook cover, ready for the next step.
Third Step: Paint pen time
Go over the pencil outline with your paint pen. I used a posca pen but you can use a sharpie or other brand paint pen for this, just make sure they are opaque enough to stand out on against the background.
If, like mine, your design is in a calligraphy style or has thick letters, go back over each letter and fill in the extra font weight using the print out as a guide. For calligraphy style, each downstroke of the letter needs to be thicker.
I have left my designs very simple, but you can add washi tape, copy across some flower outlines or add other embellishments that will fit the style of your wedding.
And it’s as easy as that!
Don't forget to leave a good wedding guest book pen out for your guests to sign your masterpiece on the big day - white gel pen looks especially good if you choose to use a kraft or black book.
Other options
For other wedding guest book alternatives, and if you want something a bit more fancy, like an embossed book or gold foil cover, check out Etsy's personalised guest book listings.
This one on the right from Lovelydayprintshop is so pretty.
For even more Guest Book ideas, follow my board on Pinterest:
I'd love to see your guest book, Leave me a comment below with how everything went or join my facebook group here for more tips and ideas on wedding decor.


